Wooden Chess Sets

Competitions, DIY, New Item, Shop Stuff

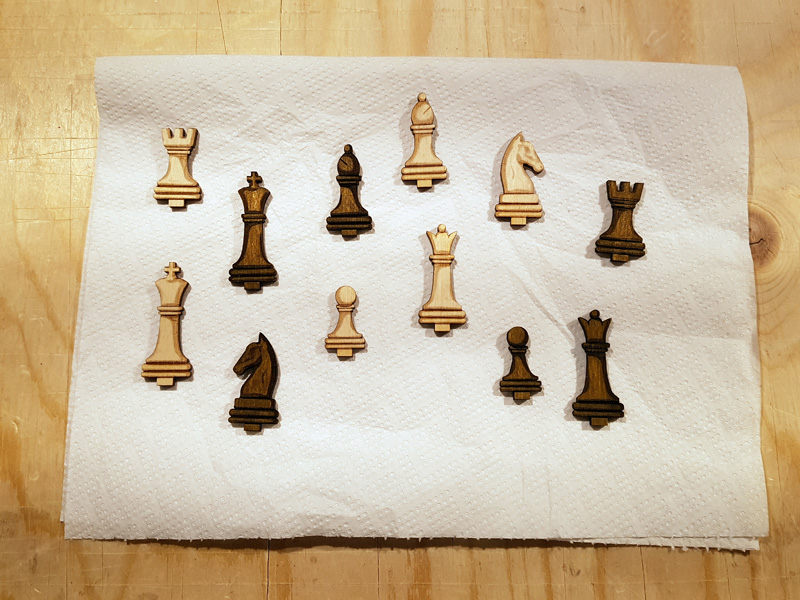
Using a laser to quickly make wooden items is easy. However, to make nicely finished items requires more than just a “cut-and-go” approach. I made some travel chess sets by cutting and engraving the board and pieces using a laser. But this was just a very small part of the project. Here is the finished project after many hours of designing, sanding, cutting, staining, more sanding, gluing, sanding and more sanding (available here).

4

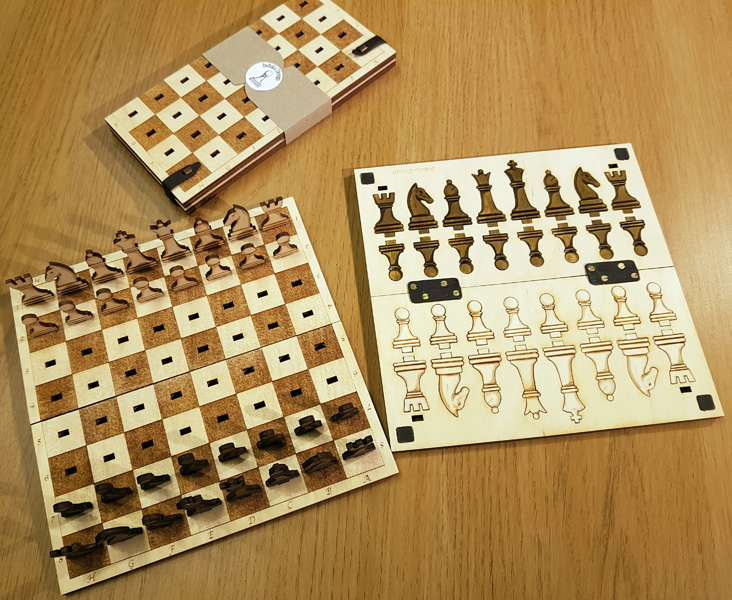
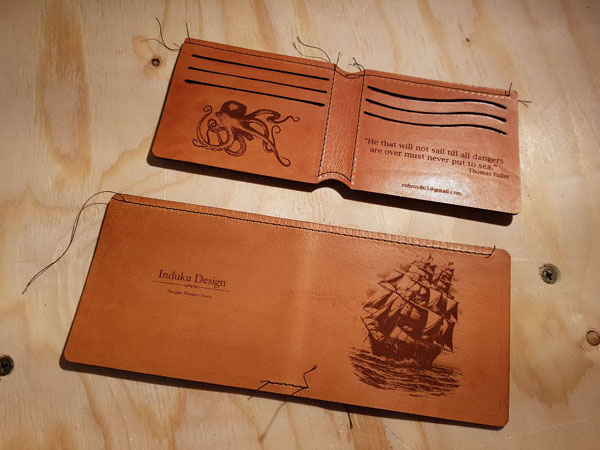
Finished chess set – Open, Closed and Ready for play.

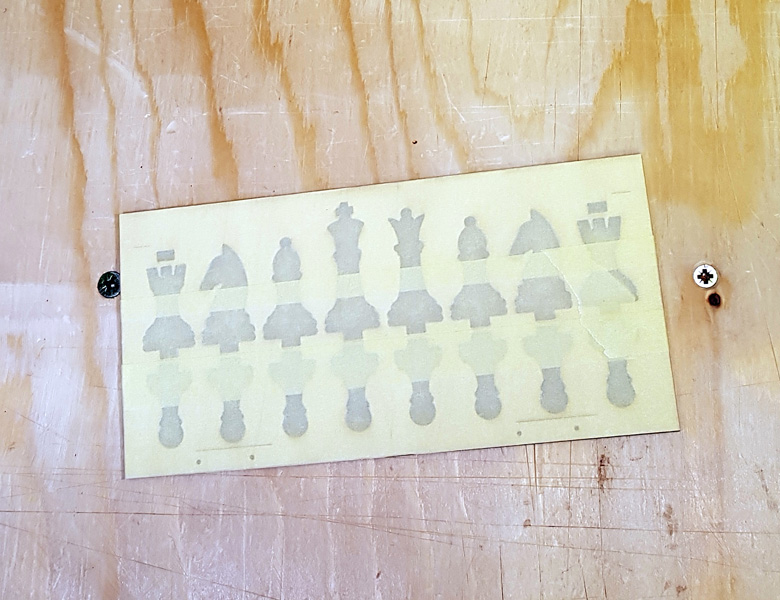
This chess set is based on another set that I have, but people dislike the pixelated pieces (see/get the pixelated set here). Using the same layout  as with the pixeladed set I redraw the pieces, first in Corel Draw. I then added the shade in Photoshop and ported it back to Corel to finalize it before sending it to the laser.

draw.JPG

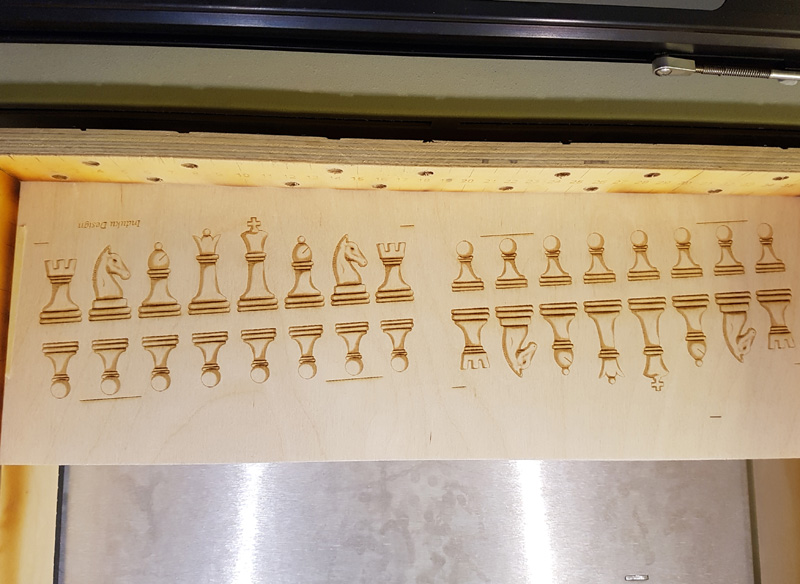
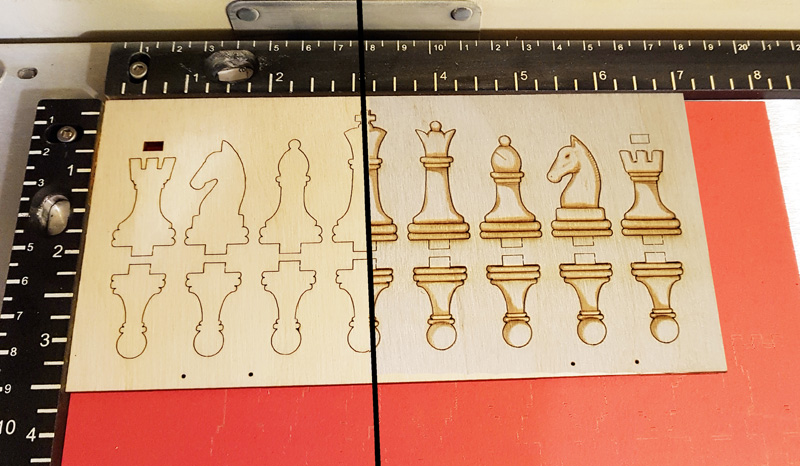
“Classic” piece design.

(In previous projects I started with drawing the images first using Photoshop and saving them as .jpg. I then generated the vectors and exported them as .ia files from Photoshop. I imported the .jpg into Corel and overlay the .ai vectors. This allows me to make the cuts after the images have been engraved, exactly where the outline paths are generated (I used it in several other projects). HOWEVER, the paths that are generated from a bitmap type image are not exact. This means when a circle is converted from a bitmap to a vector, it is not completely round as the path is followed where the pixels are located. These which are never at a high enough resolution to be perfectly round (for the pixelated chess set I fixed ALL the lines in Corel since the lines are supposed to be straight but the path generated is often not). The inaccuracies creates a small problem as pieces are not 100% symmetrical. It cannot be seen by eye but since the front and back pieces in this chess set is the same it is possible to place the piece backwards when storing. This asymmetry can make the piece get stuck when placed in backwards. – Starting with the vectors, as I done in this project is much thus much faster and mode accurate.)

In addition to the wooden parts I also design the leather hinges, feet, latches, and cardboard sleeve. The design of the board and pieces, and other parts (including some test cuts), takes the second place for most time spent on this project.

I use a custom jig to hold the plywood flat when cutting. This is probably the best jig that I have ever made since plywood is never completely flat and the focus of a laser is always exact (this is one of the main reasons why I was considering the Glowforge laser, which has auto-focus).

11.JPG

My favorite jig.

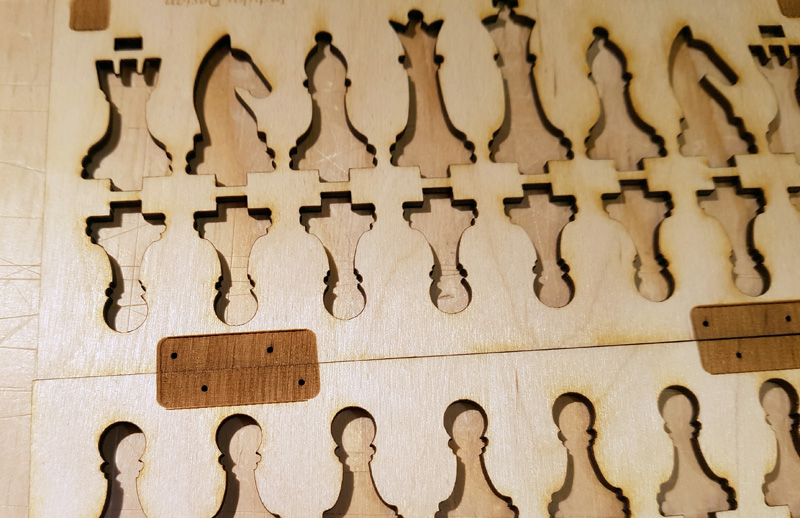
The boards and pieces are engraved and cut at an angle (4 degrees), relative to laser bed layout and wood grain (see below). There are several reasons why I do this. The first is that it ensures that the pieces are less likely to break. Since I engrave on both sides there is a chance that the wood in the middle sheet (there is only 3 sheets in this plywood) would need to carry most of the strain. If the grain in this sheet is in the wrong direction the pieces would could break more easily. However, when engraved at an angle the grain cannot be parallel to the weakest point and the pieces are stronger. I also found that engraving at an angle makes the horizontal lines slightly lighter and the vertical lines slightly darker (this is due to the laser only flashing quickly when engraving thin vertical lines part while being continuously on while engraving thin horizontal lines – when engraving lines at 90 degree angles). The engraving is thus much more even. A larger angle would probably be better but 4 degrees is the maximum I can turn the parts and get the same number of boards cut.

20171118_173041

Engraving the pieces at a 4 degree angle.

20171118_234447

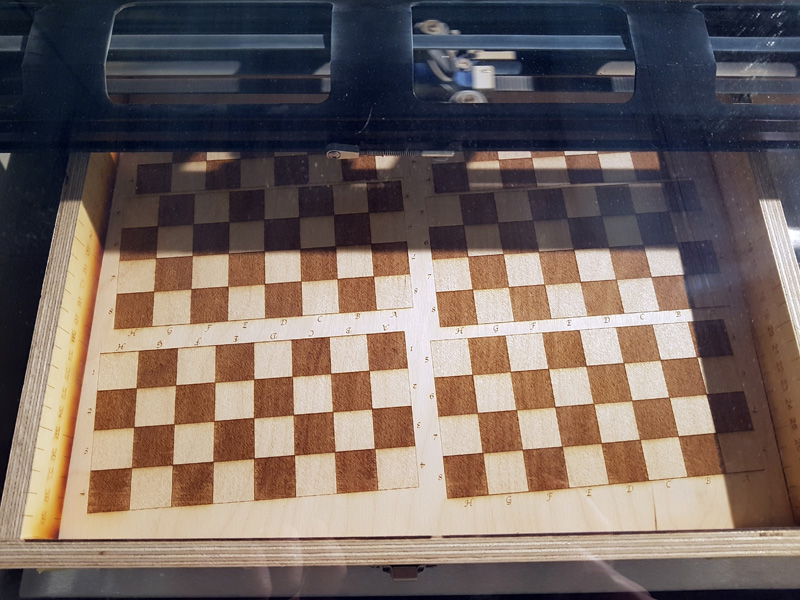
Engraving the boards – also at an angle.

After the pieces are engraved and cut, I engrave them on the other side.

t

The engraving of the back.

20171119_134044

Pieces engraved and cut. Top – front engraving, slightly more stained because this is also the cutting side. Bottom – back engraving.

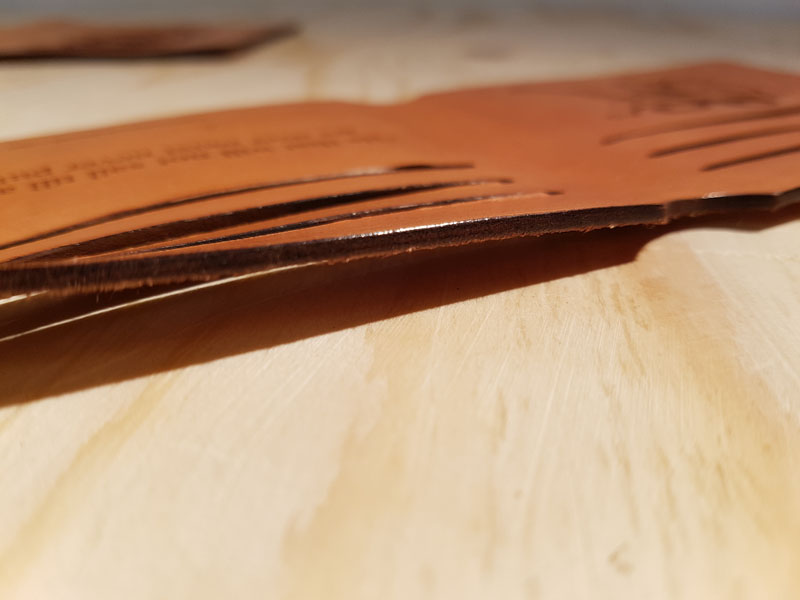
I remove the pieces and make a deep engraving to create recesses for the leather hinges and feet. This allows the leather parts to sit in the wood. It also ensure that the parts are glued much more securely. I add masking tape at this stage to reduce the amount of sanding needed to clean the part later.

20171119_135248

Masking to reduce stain before deep engraving.

20171119_141724

Recesses for hinges and feet.

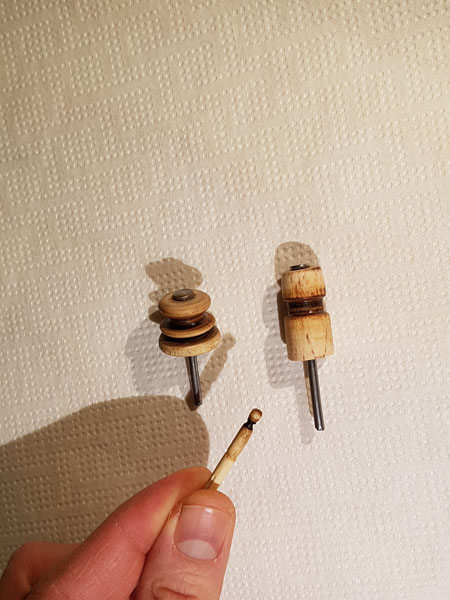
Next the feet and hinges are cut.

20171123_121551

Leather feet and hinges.

Once all the parts are cut, the biggest part of any woodwork project begins – sanding. First I remove the burrs on the bottom of the pieces where they were attached to the wood. This means they will slide more easily into and out of the recesses when the board is assembled (I also sand the burr in the recess).

20171121_124147

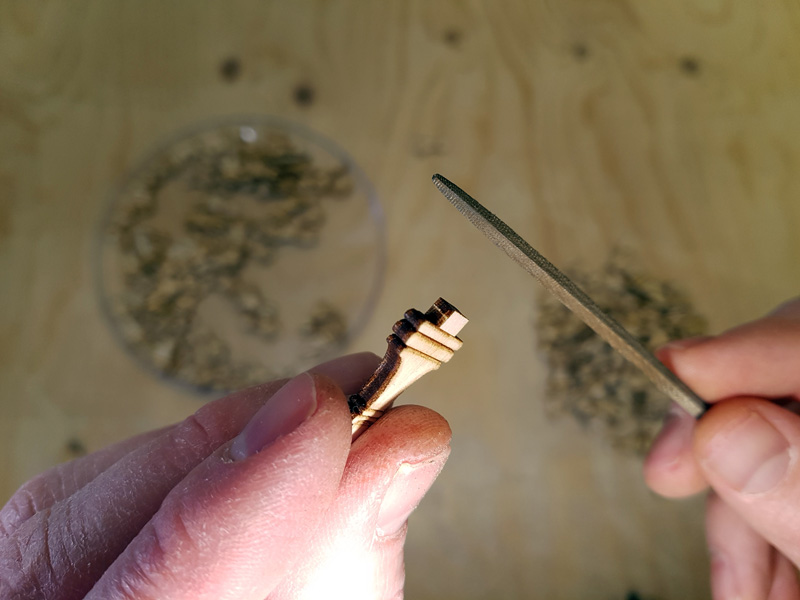
Removing the small burr where the piece was attached.

I sand everything with 400 grit sandpaper to remove all the laser burns and stains, being careful not to sand to deep and remove any of the engraving.

20171119_142610

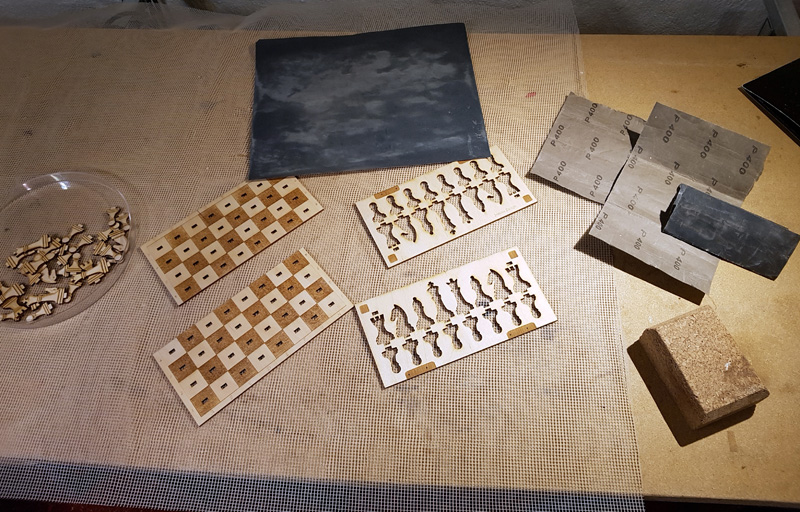
The start of the sanding process.

20171118_161159

Top – not sanded. Bottom – sanded. Both pieces were wiped with ethanol to remove some of the stains.

I stain the dark pieces with light walnut (this gives a similar color to the dark squares on the board).

20171118_114431

Test staining to get the color correct.

20171129_113004

Staining.

After drying each piece is sanded again, very gently with 800 grit sandpaper. The light pieces is also sanded at 800 grit to give a silky smooth feeling to every piece.

20171129_150028

More sanding – up to 800 grit.

During this time the board is assembled. The front and back parts are glued together.

20171123_102505

Never enough clamps.

After gluing the edges are given a final sanding and the corners slightly softened.

The leather feet and hinges are glued in place. Small screws are added to the hinges, more for aesthetics than anything else. Everything is clamped overnight.

Skärmklipp1

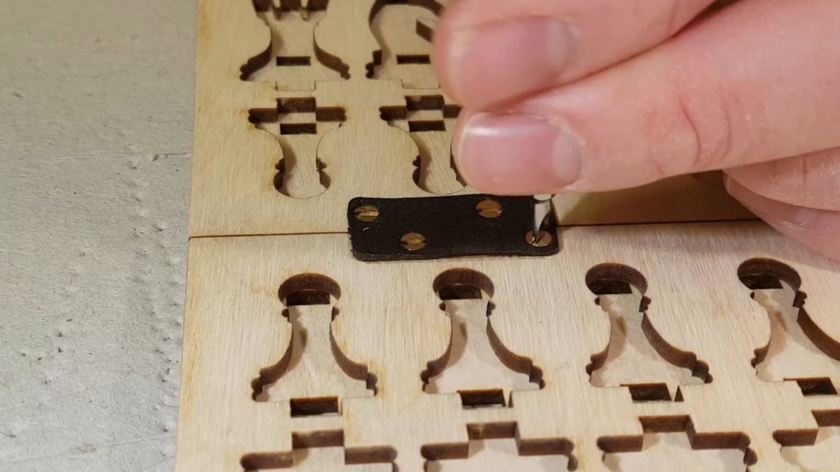
Adding the leather hinges.

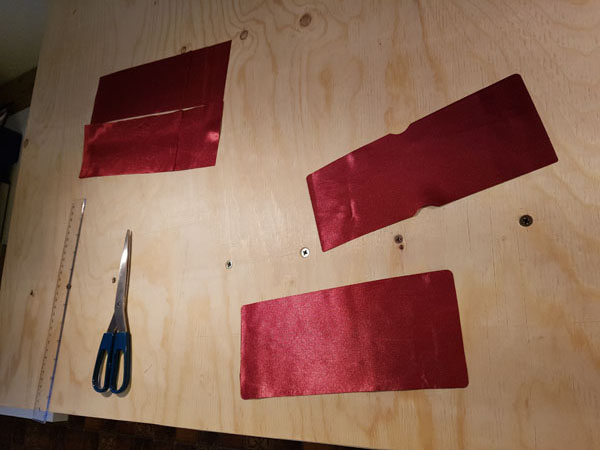
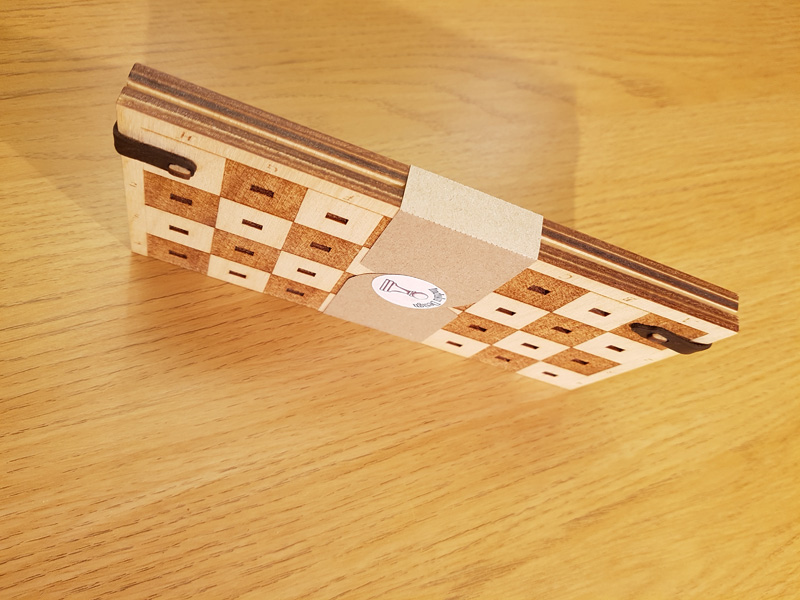
The last part to make is a sleeve for each set. This is also done on the laser. Although it may not seem to be very exciting (and no one really cares to hear about this part) it is very nice, just insert cardboard or paper into the machine and get perfectly fitting boxes and sleeves (or circular labels). I of course spent a bit of time designing these but now I can make many without too much trouble.

20171129_114044

Cardboard sleeves.

Skärmklipp

Perfect cut labels.

The final step is to check that each piece fits into their respective slots and into the board. I fix any minor problems with more gentle sanding, and touching up with stain if required.

With the pieces stored the board can be closed with the custom leather lathes. These are now ready to be sold (buy it here), used, or given away (see the video to see when I give them away).

20171129_144832

Custom latches to keep set closed – see video for how they work.

20171129_114102

Cat tax – photo of the Kwagga taste testing the camera tripod.

I think I am now done with the flat-pack type travel chess sets. I like this set more than the pixelated set. I may make another chess set in the future but the next project I am working on is more mechanical with several gears and other moving bits, stay tuned to see how it turns out…

R

Mini Puzzle Box

Competitions, Induku Wooden Models, New Item, Shop Stuff

Since I discovered puzzle boxes I wanted one. I still want to, one day, own a high quality decorative box that require more than 50 steps to open. Because I have access to  a laser cutter and some thin wood I decided to make my own (I made a few and will give some away comment on the video to stand a chance to win one).

I call this box the ibhokisi. It is the Zulu word for box. I made several prototypes until I had one that I could sell as a kit. This kit is small enough to fit into a postcard sized envelope and makes a lovely gift “card”. I also personalize the the box by engraving a message or name on one of the sides: get yours here!

puzzle box (8)

The whole kit.

Plans to construct the box is included and also show how to open and close the box. Download it here:

puzzle box

A video with some instructions to make assembly easier is available HERE:

puzzle box (6)

All the bits and pieces.

I am not sure exactly how to count the number of steps but if each separate move is a step it takes 13 moves to open the box. The majority of these steps is navigating through the maze on the one side of the inner drawer of the box.

I am also not exactly sure where I saw this type of mechanism and cannot find it online at this stage. I have however seen it somewhere and any comments/links to the origin of this mechanism would be appreciated.

puzzle box (2).jpg

Opened successfully.

Lastly, in a shameless attempt to grow my YouTube channel I am going to give away several of these box kits:

  • I will give one to the first subscriber of my channel that comment on the box video (to be uploaded soon).
  • I will give a  kit to one of the first 10 commenters  on the box video (chosen at random – must be a subscriber).
  • I will give a  kit to one of the first 100 commenters  on the box video (chosen at random – must be a subscriber).
  • I will continue to give a box away for every 10 fold increase in comments, as long as I live (assuming YouTube is still around and this video is still available through them).
  • Full instructions will be posted online.

Subscribe to my channel now to get an update of when the video is uploaded and comment first (or soon to increase your chances of getting a box kit) – IF you want a puzzle box of your own.

I will make more puzzle boxes in the future. I will make them larger and more intricate with novel mechanisms (some of these are already rolling around in my head). I am very happy with the final version of this first mini puzzle box and are looking forward to designing more.

R

See more Induku wooden models here:

Strandbeest Kit

Windup Car (envelope sized kit)

Or buy them here: Shop at Induku Design.

 —

facebook

instagram

youtube


Leather Wallets

Competitions, DIY, New Item, Shop Stuff

After making a card holder for my wife (here) I thought that I should upgrade my own wallet (see below). My confidence in working with lasers and leather is slowly growing and I thus decided to make, not only one, but 7 wallets. Below I will show all the steps for making one of these. I am happy with the final product and will keep the first (the prototype) for myself.

Photos of the finished product:

I will also give a wallet or card holder away – more information on the give away here. You are of course welcome to buy one, they are available here.

20170507_134752

One of these currently up for grabs!

Steps to make a leather wallet (the steps I took – not necessarily by the book):

A with everything the project begins with an idea. I also spend a fair bit of time on looking at YouTube videos of making wallets and looked at many many many wallets online. I could not find something that exactly fit what I wanted to make and created my own design. I make some ugly scratches of this to ensure that all the dimensions are right.

20170503_101943

All the planning done.

I wanted a wallet with card slots and a place for money but only wanted to have 2 layers of leather. I also wanted it to be a bi-fold wallet. Most of the designs I looked at had more than 2 layers of leather. I thus created this design (this it probably not new I just could not find something made in this way).

Since I wanted to make a several wallets simultaneously I spend a day getting all the images and quotes. I had some help.

20170503_150820.jpg

Kameel – helping out??

After the designs were ready I cut the leather.

20170502_165656.jpg

I love this rotary cutter – best way for me to cut leather.

This is followed by engraving and the cutting of the individual pieces.

20170502_171553

Closeup of cutting laser cutting.

20170502_171733

First one engraved and cut.

20170503_230805

The prototype worked – now 6 more.

A quick cleanup (just wiping the edges with towel paper) is followed by staining. I made a light red stain a long time ago. This means that I do not know exactly how much the original red stain is diluted. Some people may think this is sad. I think this is awesome since these wallets can never be reproduced exactly and will be unique 🙂

20170502_173156

Just a light bit of stain.

20170502_175543

I stain the inside where the satin is stitched also – this way no unstained leather will show.

I burnish the slots with a small burnishing tool that fit exactly. The top of both inner and outer parts were also burnished. This is where the wallet will open. The other sides will be glued and stitched together and burnished after this has been done.

20170504_150250

Adding some soft wax just between the slots prior to burnishing.

20170502_184549

Slots and top edge burnished.

My small set of burnishing tools is increasing in number. I should note that these are all home made. It is merely a stick with a nail glued in place (or in the case of the small one – just a stick). Grooves are sanded into them as wide I they need to be for the specific project.

20170506_192352.jpg

Home made burnishing tools

I love cutting silk using the laser cutter – which was the following step.

20170502_175531.jpg

Silk to make pockets and line the inside.

With all the pieces ready the slow process of assembly begins. I start by making the top 2 card pockets (the lower pocket is created by  stitching the outer and inner pieces together – I explain how these pockets are made in more detail here or have a look at this video).

20170502_190446

Enter a caption

The inner silk is glued and then stitched in place. It is only partly stitched. The rest of the stitches follow when both outside and inside pieces of the wallet is stitched together.

The process is similar for the outer part. The silk is glued in place and the top and bottom stitched where the inner and outer parts do not overlap.

20170502_192126

Silk lining glued in place – outer part and inner part

20170504_200939

The sewing machine I use – Singer made around 1910.

20170502_193612

Silk stitched in place

The nylon thread is cut and melted to stay in place.

20170502_193635

Melting the ends of the thread.

The outer and inner parts are then glued and stitched together. First the one side then the other.

20170505_115722

Glued and clamped.

20170505_142846

One side stitched.

20170505_142849

View from the inside.

Here I had a small problem with the sewing machine. The upper thread kept on breaking. Initially, I solved the problem by first making holes with the sewing machine without thread and then sew a second time with thread. Although this worked it was of course not optimal. After some searching I found the user manual and I was able to correct problem. The tension of the top thread needed to be adjusted and the problem is now resolved.

20170502_220934

Short term solution.

6c76ce4186b6d735f6ae67928f96dd95

Better solution – read the manual.

20170502_223018

All stitching done

I lightly sand the glued edges (not the sinlge edges that have already been burnished). This is followed by burnishing of these edges.

20170502_225600

Beautiful edge.

The wallet is in essence now completed and the last thing is to treat it with some leather conditioner. I add a liberal amount to the outer inner leather and leave it on for 10-20 minutes. This is wiped off with a clean cloth and the wallet is lightly polished.

20170506_193502.jpg

Wax on.

20170507_132006.jpg

Wax off.

I was planning to make a new wallet for myself for over a year now. I would have done this even without the laser cutter or the sewing machine. These items just allowed me to make a different type of wallet than I otherwise would and I do not feel that any specialized machine is needed to make stuff. This said, as soon as you start making stuff tools seem to increase around you.

20170502_163408

The reason for this project – my old worn wallet, falling apart a bit.

A brand new wallet


There are a few small things I would change if I were to make these again. First, I would move the stitches closer to the edge (from 5 to 3 mm). I will also change the arch of the line where to to be exactly the same as the arch of the corner itself. This is something very minor and would probably not be noticeable. I will also try different staining colors – just for fun.

R


facebook

instagram

youtube

store